


Fun Stuff at 52 Mantels:
October 31, 2011
October 30, 2011

October 27, 2011

October 25, 2011

A Bit of Business
As you can probably see from my sidebar, there are some new, exciting things happening at 52 Mantels! First of all, I finally created a facebook page, so feel free to join me there. I've been told it's the place to be. So, there I shall be.
Go ahead and like me, I'll wait.
Are you back? Oh good.
This next bit of info is big! Just as soon as we get this whole Halloween business out of the way, we can start with the good stuff: Thanksgiving and Christmas. I'm all a-tingle in anticipation. I plan on giving Thanksgiving a fair shake with a handful of mantels and maybe a tablescape or two (can you hardly contain your excitement? be honest). But, Christmas, oh beloved Christmas, that is where my heart truly belongs.

October 24, 2011
Mysterious Black Halloween Mantel

Halloween is next week so I've decided to take the mantel to a dark, mysterious place. Mu-whah-ha-ha! (Did that sound effect come through??). Of course, my bats HAD to come back for the occasion. How could I tell them to stay away on Halloween?! And, the EEK letters from last week stayed and somehow found a couple more Es. Mysterious, indeed!

Remember how I said I'd find a use for the rest of the cheese cloth used on my Halloween wreath? Well, it was perfect for this mantel.
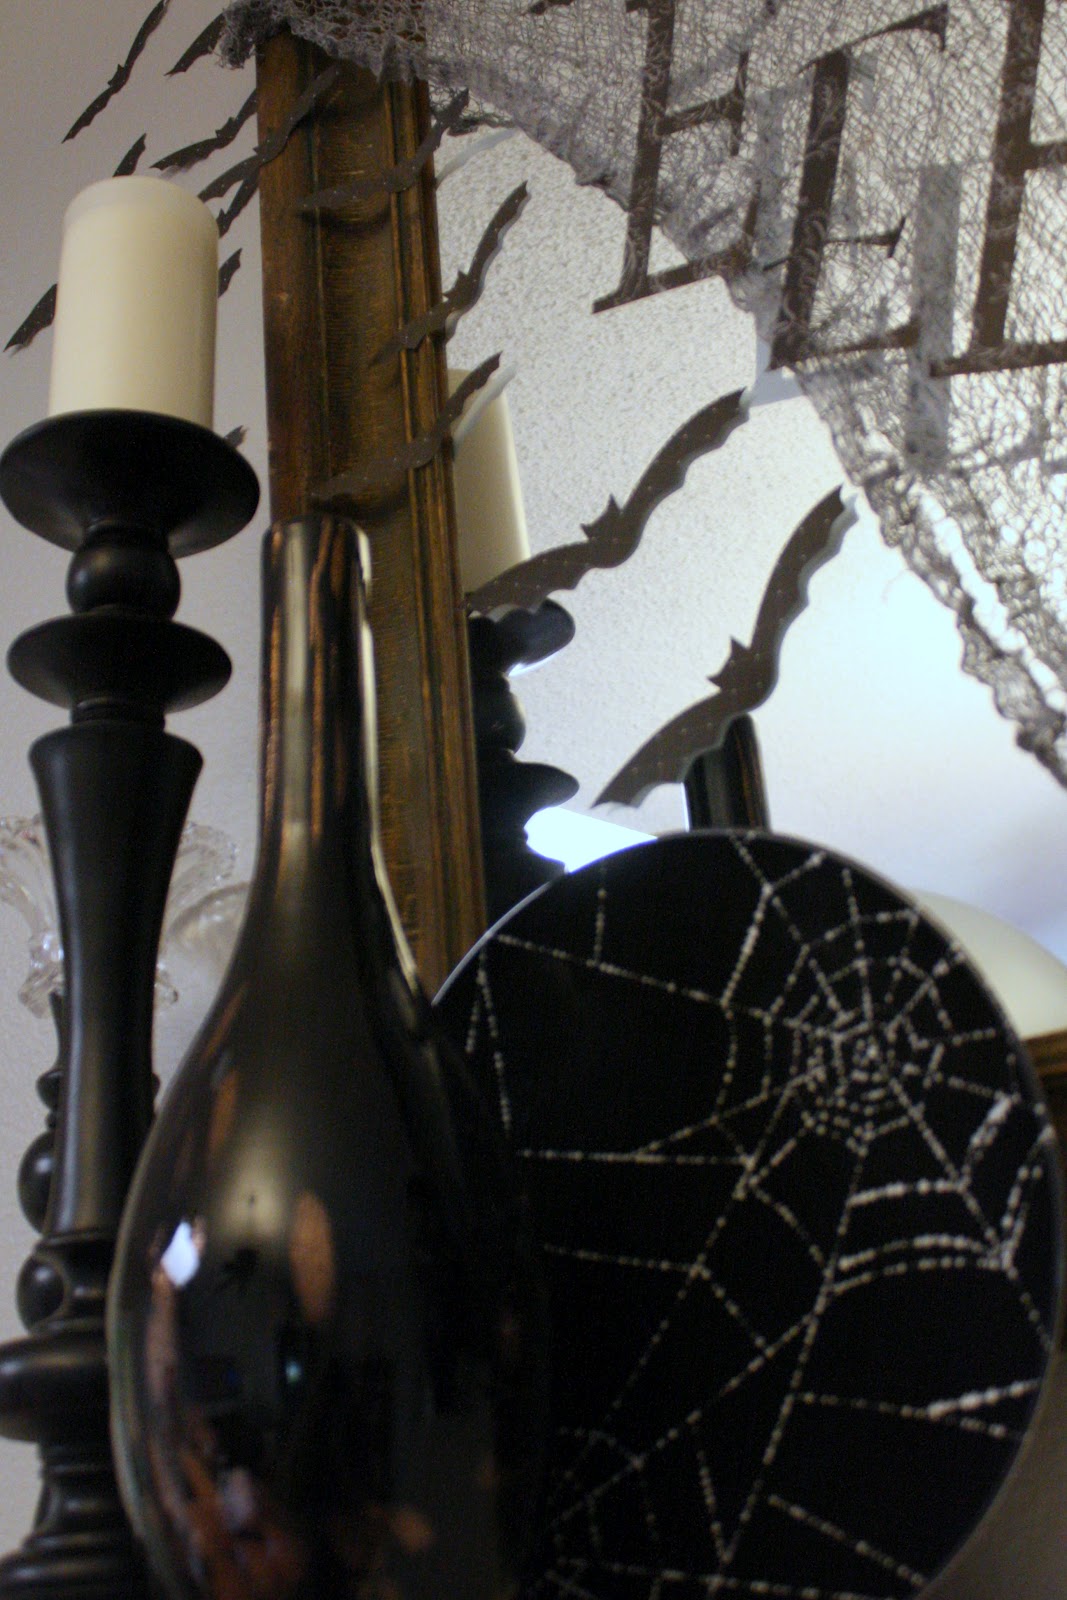
I picked up this melamine plate from Target for a couple bucks. The various dark vases and candle holders were gathered from around my house.
|
I got the "Boo" sign off the dollar spot at Target. Love the dollar spot! It was glittered to high heaven and left a mess on my floor (and mantel and face and infant) but the mess was worth it, in my opinion!
|

Good luck with your last minute preps for Halloween!
October 22, 2011

October 20, 2011
Caramel Apple Cake Pops
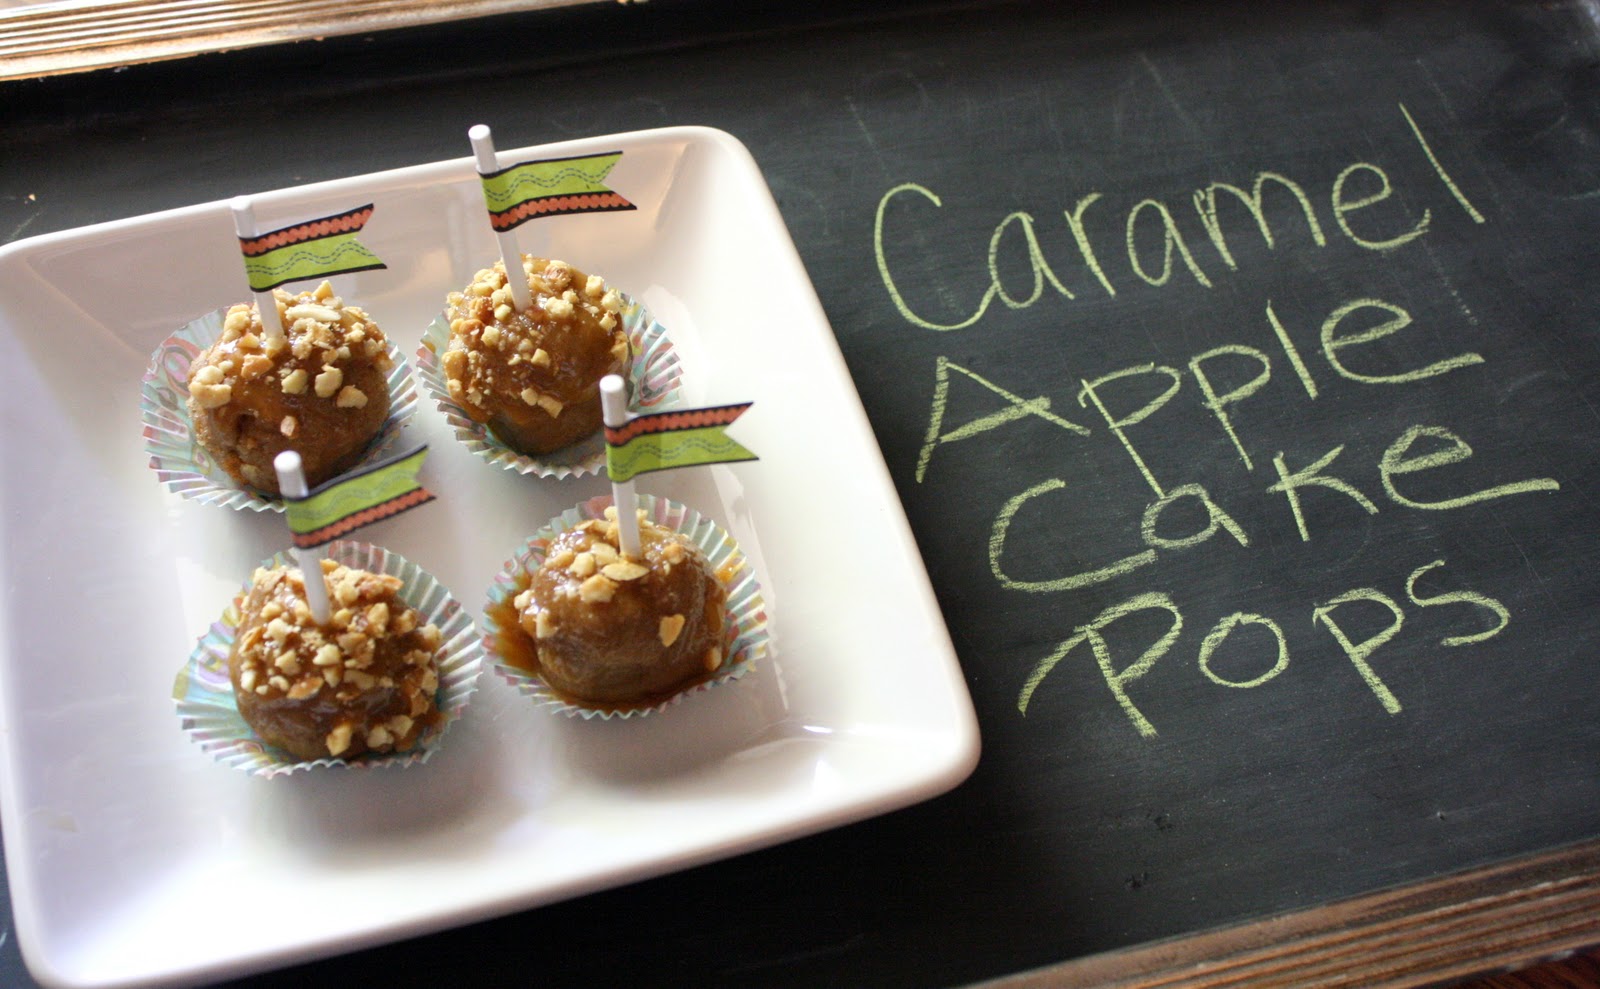
When I was put with the challenge this month to use caramel and apples in a recipe, I knew I had to take that challenge. What's more festive in October than caramel and apples?!
I've had this idea bouncing 'round my head for awhile to make cake pops that look like candy apples. This seemed to be the perfect opportunity to do just that. I will confess now that it didn't go as smoothly as I'd envisioned. But, we'll get to that.
The most fitting title for this blog entry is probably "A Tale of Two Cake Pops". In one corner we have the green (as in apple) coated pops and in the other corner, our pops are sans coat. At the end of this, you'll get to decide if you like your Caramel Apple Cake Pops to be coated or naked.
But first...
October 17, 2011
Earthy Orange & Cream Halloween Mantel
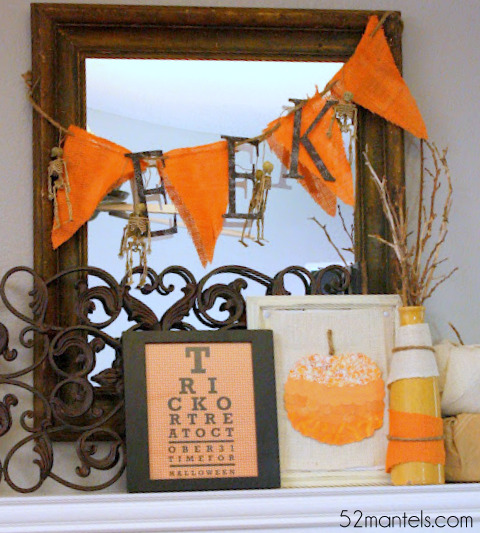
This mantel feels a bit more earthy than my Batty Turquoise mantel from last week. The free eye chart printable from Jen at Tatertots & Jello had to make a return because I love it so! I'm not really into "gory" Halloween, hence the pumpkins and "candy corn" vase, but I did add a touch of fright with the skeleton banner. Just a tiny, baby fright, really.

October 13, 2011
Monogrammed Pumpkin

The other day I purchased a big, beautiful pumpkin from the grocery store. I knew it would end up on my front porch, but wasn't sure if I was going to do something with it first. Well, come on...how could I not?! A bare-naked pumpkin just begs to be crafted. So, crafted it got.
I like using vinyl as a reverse stencil because it's super easy and almost no-fail. And, you don't even have to have a digital die-cut to use vinyl! They sell it by the sheet in a lot of craft stores, or you can buy rolls online through a multitude of sellers. And, most vinyl comes with a grid pattern on the papered backside, making tracing and cutting a breeze.
Monograms are an easy thing to hand-cut from vinyl! Simply print your monogram on standard paper, cut and trace onto vinyl.
Of course, I used my silhouette to cut the "M" because...well, if you've got it, use it. Right? But, I promise you it's not essential to this project!
I did not, however, use the silhouette to cut out my polka-dots. I always keep scraps of leftover vinyl when I'm done with my projects. I used those itty-bitty (unusable with my machine) scraps to trace and cut my circles. I then hand-placed them (no need for transfer paper with these guys) around the M. I'll be honest, since my pumpkin's backside faces a wall, I concentrated my efforts on the front of the pumpkin.
October 12, 2011

October 10, 2011
Batty Turquoise & Orange Halloween Mantel
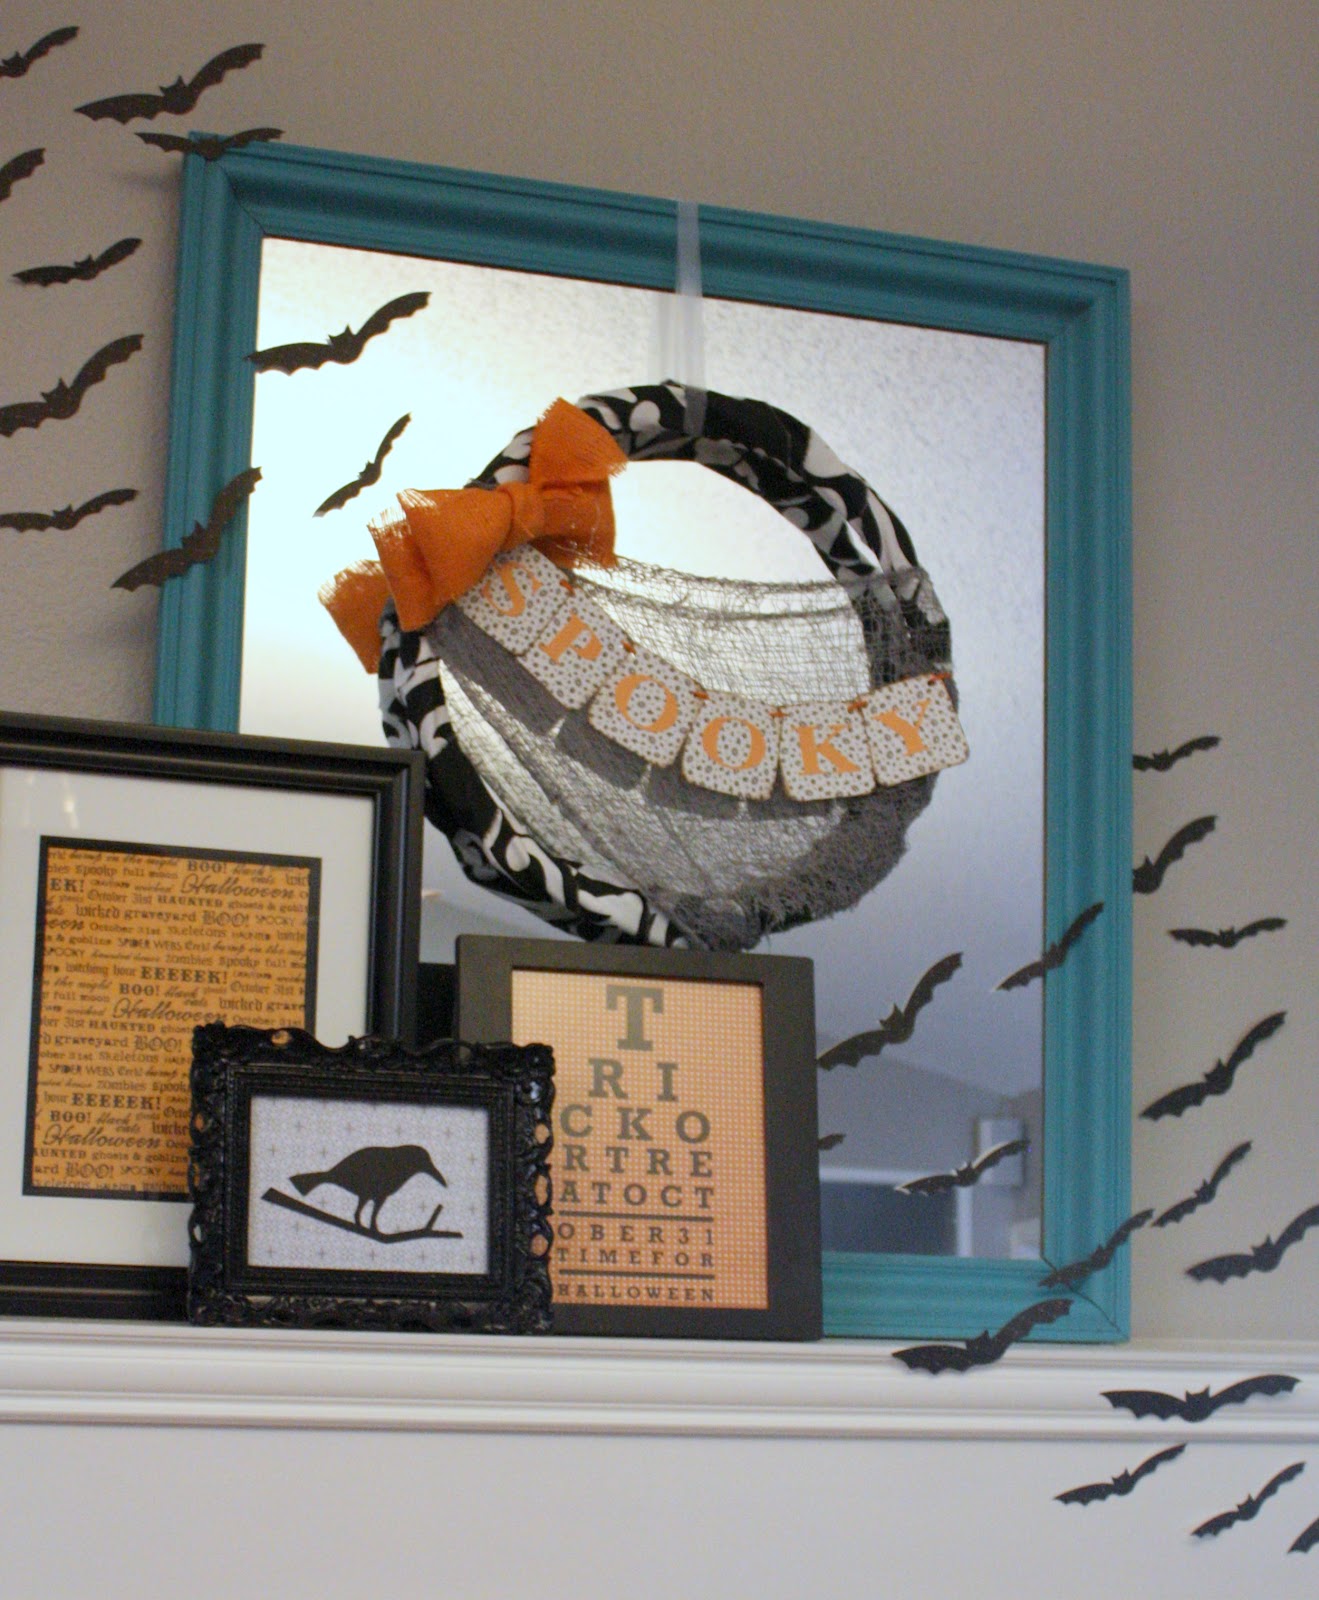
Also, on this mantel is my version of a HUGE inspiration I've seen several places this year. The wall of bats!! I'm loving them on my own mantel! I'm not even sure who to credit with this idea so I've made up a pinterest board with several beautiful interpretations. Check it out here. While you're there, you might as well follow me! You can also check out my board of FREE PRINTABLES! I've pinned some great freebies from around blog land that just might work for your mantel. And, I'm constantly adding great things it!
 |
| The FREE Trick or Treat eye chart printable can be found here! Thanks TT&J! |
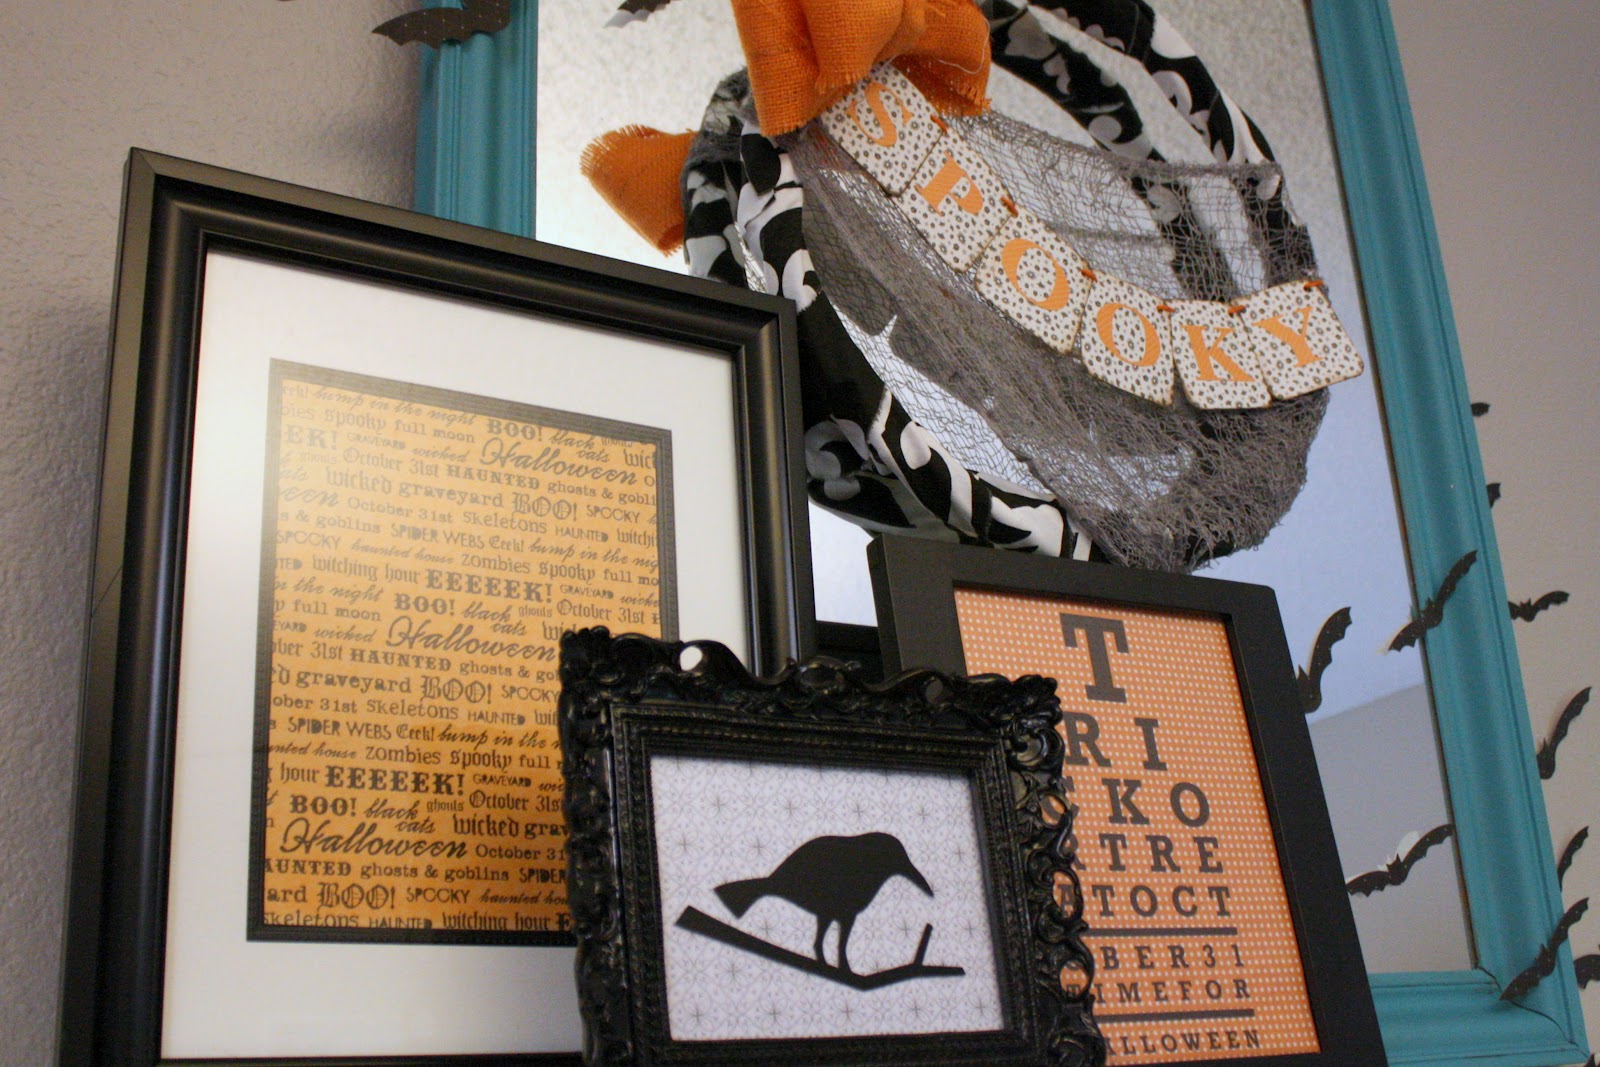 |
| Of course, I had to use the "Spooky" wreath I gave a tutorial for here! |


October 9, 2011
Enchilada Casserole
My husband loves casseroles. LOVES them. I like the convenience of them. The make-ahead-and-forget-about-it potential. The "freezes beautifully" quality. But, I don't love that they usually pack a pretty heavy caloric punch with a not very favorable fresh veggie to creamy goo ratio. If you know what I mean.
Enter the enchilada casserole. The addition of diced tomatoes, fresh poblano peppers and onions and the lack of milk, cream or butter tip the scales back to a more balanced dinner. And, when you're trying to lose a few (or, a LOT of) extra baby pounds, favorably balanced dinners are necessary.
 |
| Healthy Tip: I always rinse my canned beans to reduce some of the sodium content |
Enchilada Casserole:
1 lb extra lean ground beef
8 corn tortillas
1 14 oz can red enchilada sauce (I use mild)
1 14 oz can black beans- drained and rinsed
1 14 oz can diced tomatoes, with juice
3/4 C shredded cheddar cheese
1/2 whole white onion- diced
1 poblano pepper- diced
1 T minced garlic
1 T olive oil
Cook ground beef and set aside. Saute onion, garlic and poblano pepper in olive oil. Combine onion mixture with ground beef and add black beans, tomatoes and enchilada sauce. Tear 6 of the corn tortillas in half, making 12 pieces and cut the remaining 2 tortillas into 1 inch strips.
In a 4x8 or 8x8 dish place 6 of the tortilla halves. Follow with half of the meat mixture and then 6 more tortilla halves. Layer remaining meat mixture and spread corn tortilla strips on top. Sprinkle cheese over corn tortilla strips and bake at 350 degrees until cooked through, about 25-30 minutes.
 |
| layer away, baby! |
Yummy!
October 5, 2011
Colorful Pumpkins

I wanted to add a little Fall flare to my daughter's nursery, but didn't really want to go with autumnal colors. Instead, I kept it fun and fresh. Just like my lil' punkin!
This was a very inexpensive project. 3 bucks plus my own supplies. Not too shabby! I picked up 3 plasticy-styrofoamy (technical term) pumpkins at my local dollar tree. I paired those with some colorful socks from my stash and made a cute, little vignette for punkin's dresser.


First, I removed the stems from the pumpkins (I had to cut off the orange pumpkin's stem) and sprayed them white.
For the two green pumpkins, I slipped a sock over the pumpkin, leaving the toe seam on top. Then I trimmed the excess fabric around the bottom. You can cover the opening with a round of felt...or, you can leave it as is. Really, who's going to see the bottom of your pumpkin?


For the larger (orange) pumpkin, I had to slip it into the sock sideways. Then I gathered the two ends and tucked them under the pumpkin. Go ahead and hot glue the ends and cover with another round of felt. If you must. Or don't. I won't look.


Now, stick your stems back on the pumpkins and display. How easy is that??
Oh, I guess I should talk about that orange pumpkin. Since I cut the stem off, I had to reattach it with a long, straight pin. Which is why it has a pearl top. And, I covered the ugly seam with a strand of orange yarn.
Again, how easy is that??

October 3, 2011
Mom's Fall Mantel Evolution

A few weeks back, I got to spend some time at my parent's house for some R&R. My mom had begun to spruce up the house for Fall and her mantel was beginning to evolve for the season. She made some beautiful fabric pumpkins for the mantel, added some warm colored accents and fall leaves, and was on her way to being decorated for the changing season.
 |
| The beginnings of a Fall spruce-up! |
 |
| These fall pumpkins are of the "no-sew" variety. My favorite kind of project! |
 |
| A weathered ceiling tile and two heavy, brass trays make a beautiful, graphic start to the mantel redo. Glass apothecary jars filled with various Fall inspired objects round out the display. |

We were both pleased with the end result and my mom was happy for something new. Sometimes it just takes a fresh pair of eyes to re-imagine your old items
Subscribe to:
Posts (Atom)